How to Annotate Online Articles in 5 Simple Steps for Researchers
Learn how to annotate online articles in 5 simple steps using Web Highlights. Get features like tags, notes, and export tools for researchers.

If you’ve ever read a long article and realized afterwards you can’t remember half of what it said — you’re not alone. I’ve been there many times, especially when doing research for Web Highlights.
The fix that worked for me? Annotating as I read. Not just highlighting random sentences, but actually engaging with the text — writing notes, asking questions, connecting ideas. It sounds simple, but it completely changed how much I retain from articles.
In this guide, I’ll walk you through what article annotation actually is, the different ways to do it, and a step-by-step workflow I use with Web Highlights to annotate online articles.
What Is Article Annotation?
Annotation is just a fancy word for marking up a text as you read. You highlight key parts, write notes in the margins, ask questions, summarize sections. The point is to interact with what you’re reading instead of passively scrolling through it.
Why bother? Because it actually helps you:
- Remember more — when you actively engage with a text, you retain way more than when you just read it.
- Think more clearly — separating arguments from evidence forces you to understand the structure.
- Build a personal reference — your annotated articles become a searchable library you can come back to.
- Write faster — if you annotate well, your notes become the starting point for your own writing.
5 Types of Annotation
Not every annotation looks the same. Depending on what you’re reading and why, you might use one or more of these approaches:
- Highlighting — Marking key passages, definitions, or evidence. The trick is to be selective — if you highlight everything, nothing stands out.
- Marginal notes — Short comments or reactions next to specific passages. I use these a lot to capture my first reaction to an argument.
- Summarizing — Writing a brief summary at the end of a section in your own words. This is the best test of whether you actually understood it.
- Questioning — Writing questions about things you don’t understand or want to dig into later.
- Connecting — Linking what you’re reading to other sources, your own experience, or things you already know.
Why Annotate Digitally?
I used to annotate with pens and sticky notes back in university. It works fine for physical books, but for online research it’s a dead end. You can’t search through your sticky notes. They don’t sync to your phone. And good luck finding that one note you wrote three weeks ago on page 47 of some printed article.
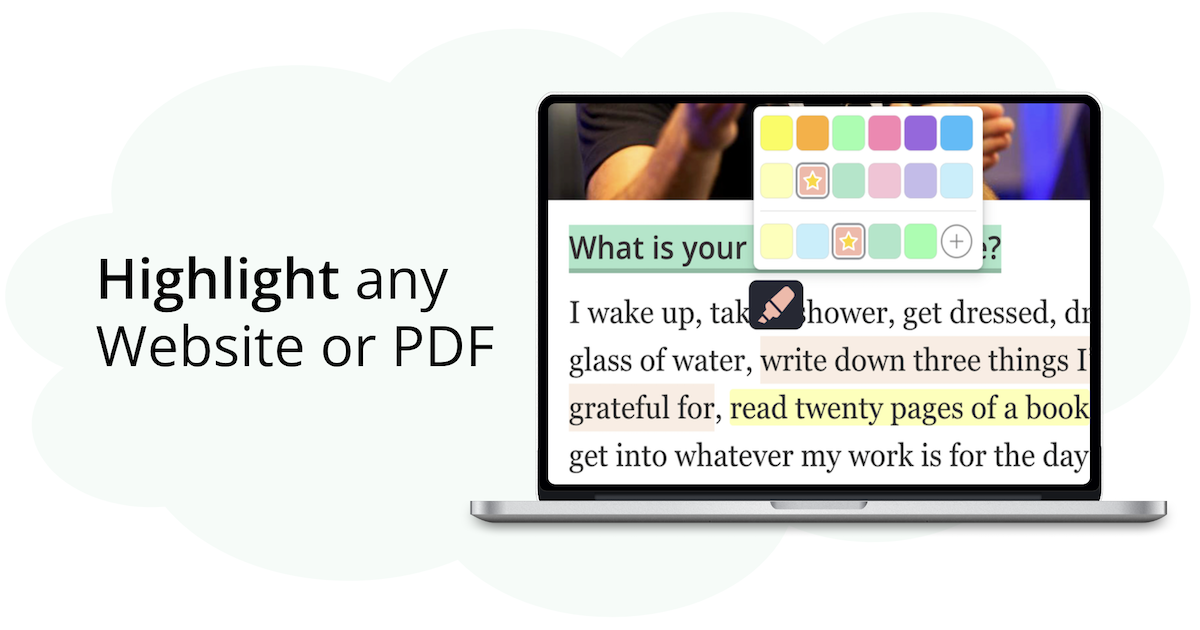
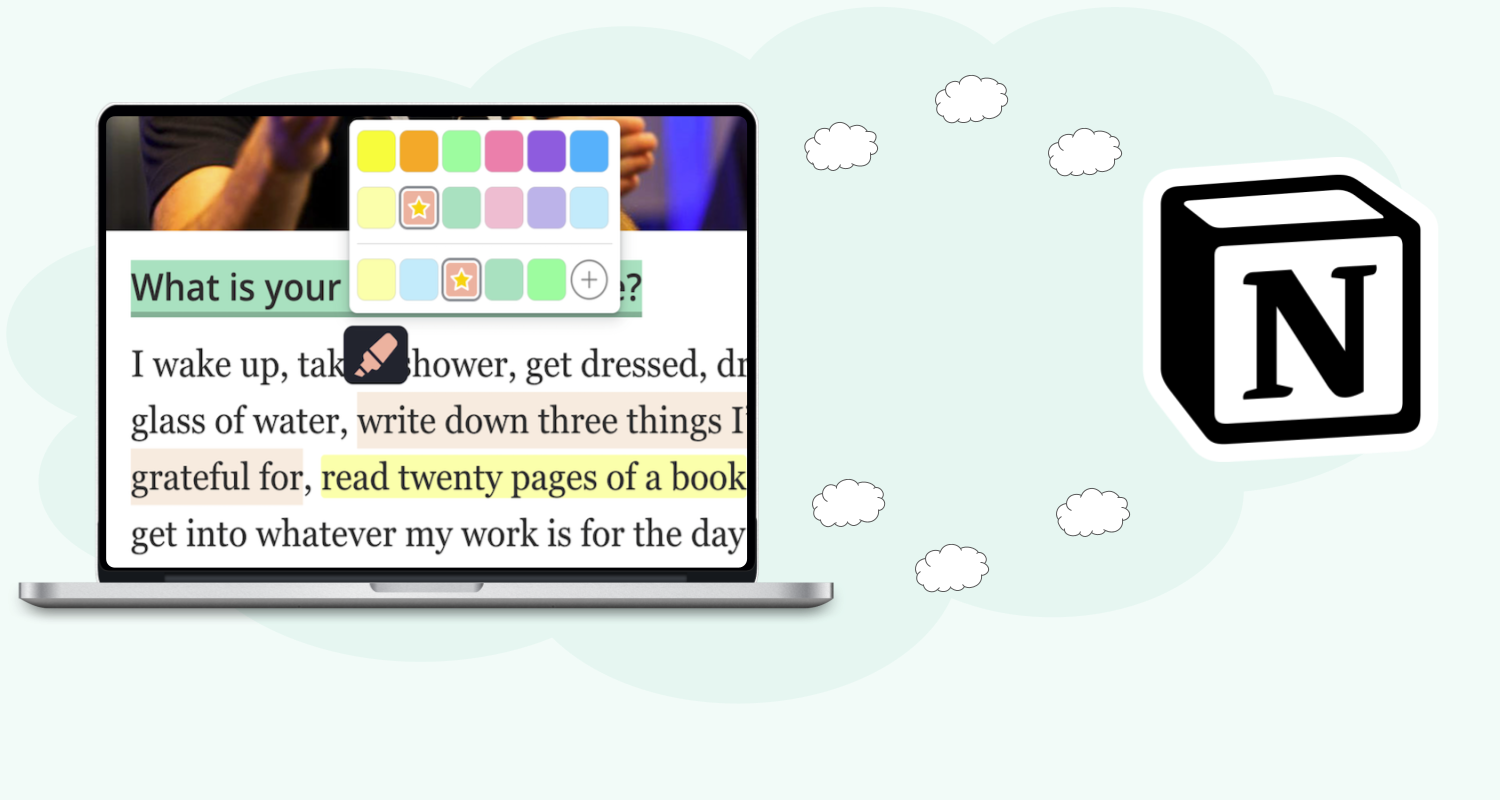
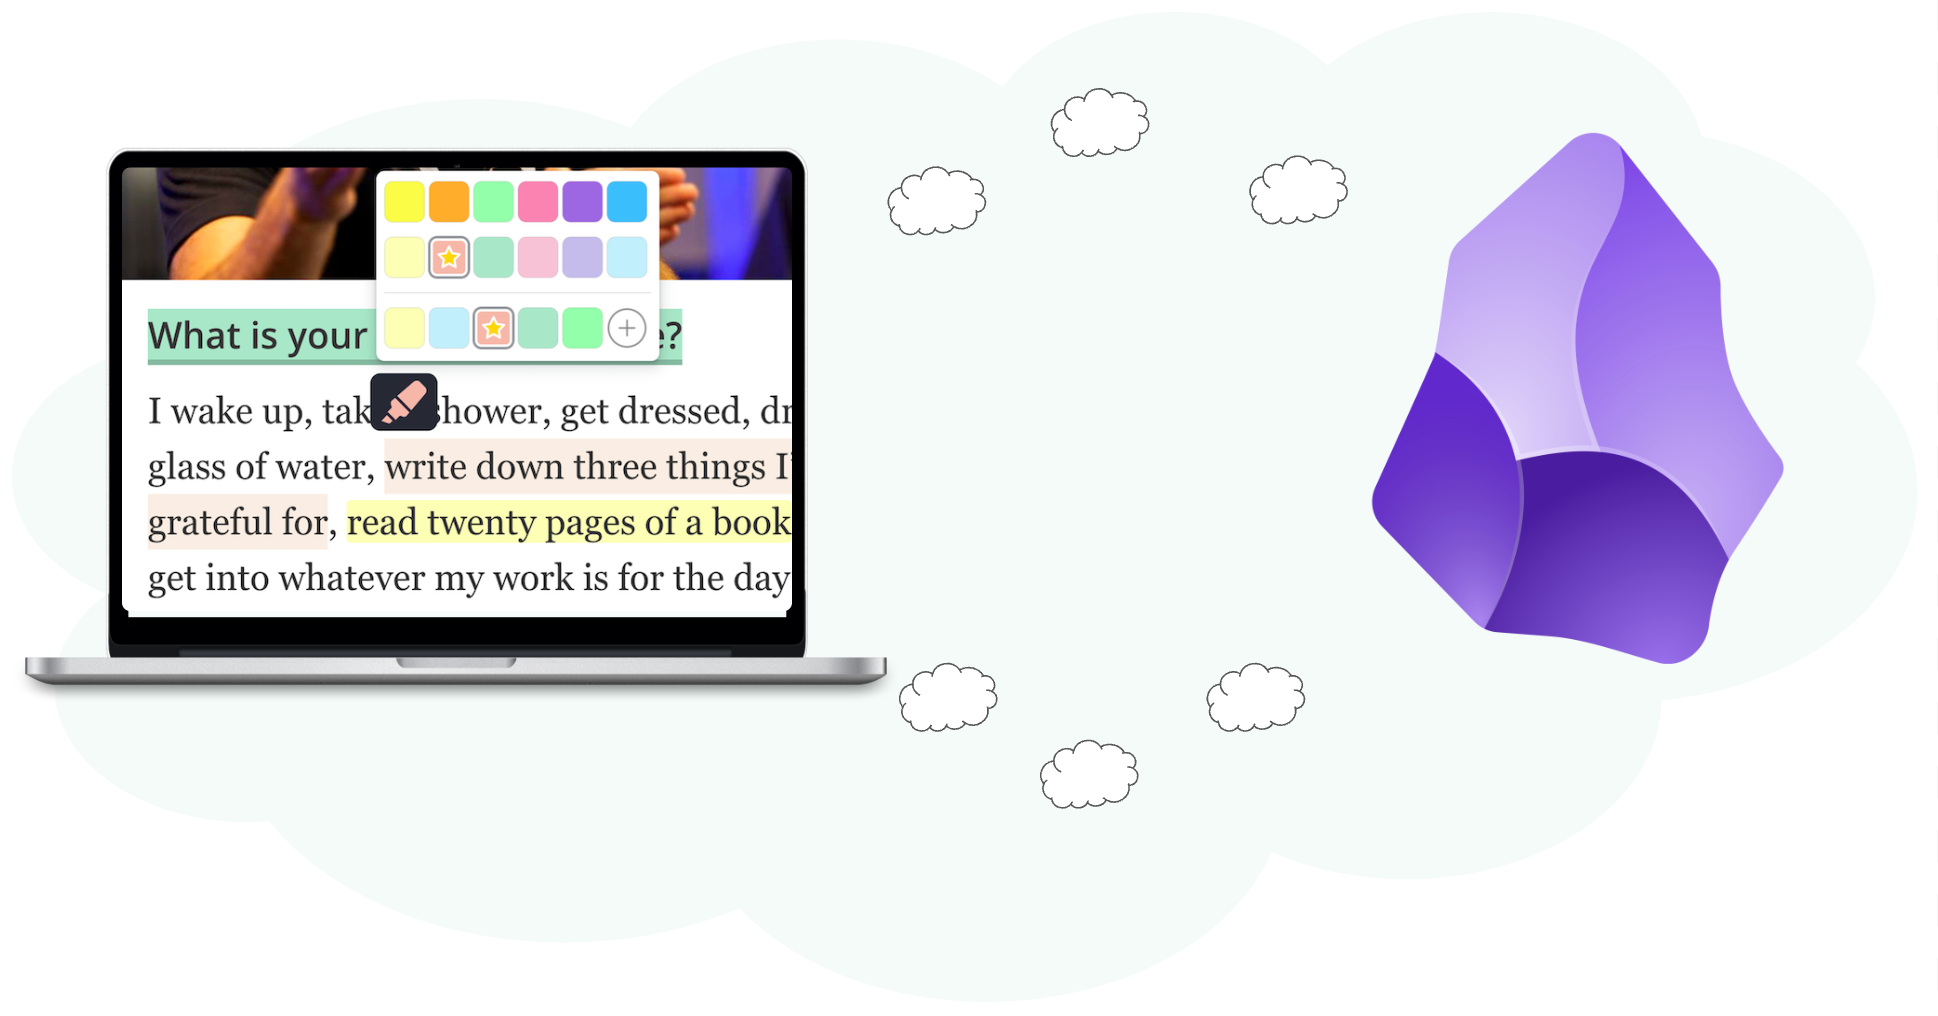
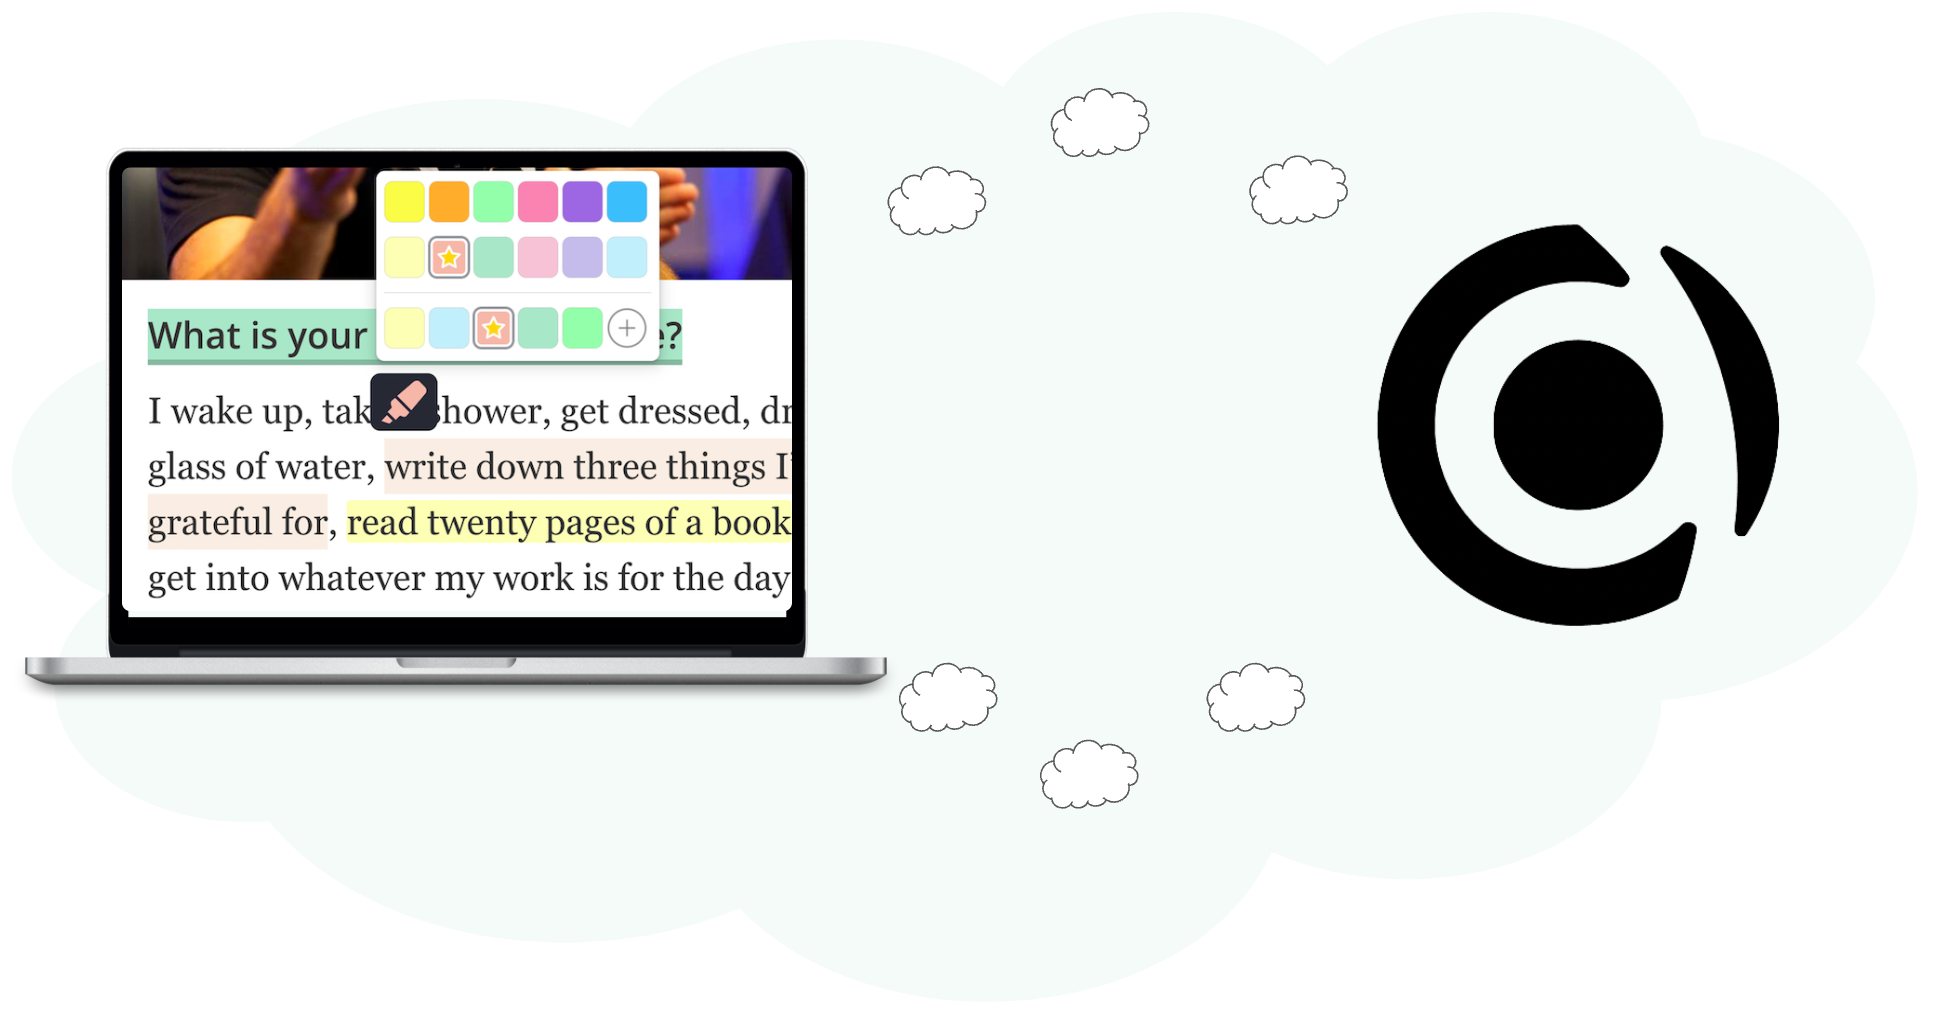
With a browser extension like Web Highlights, you can highlight any web page or PDF, attach notes and tags, search across all your annotations, and export to Notion, Capacities, or copy as Markdown for Obsidian. Everything stays organized and accessible.
Let me show you how I do it, step by step.
Step 1: Sign Up and Install the Web Highlights Extension
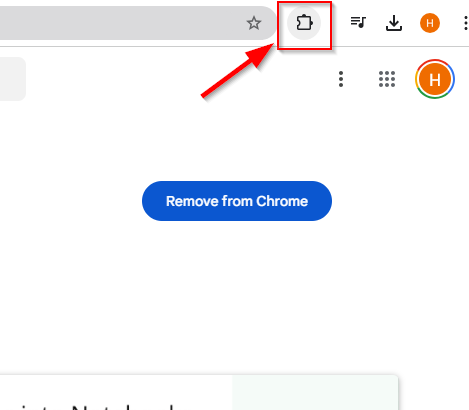
First, you’ll need to download the extension for Web Highlights.
This browser extension is available on Chrome and Edge, making it accessible to everyone. You can install it from here. To add it to your Chrome browser, simply launch the Google Store and click the “Add to Chrome” button.
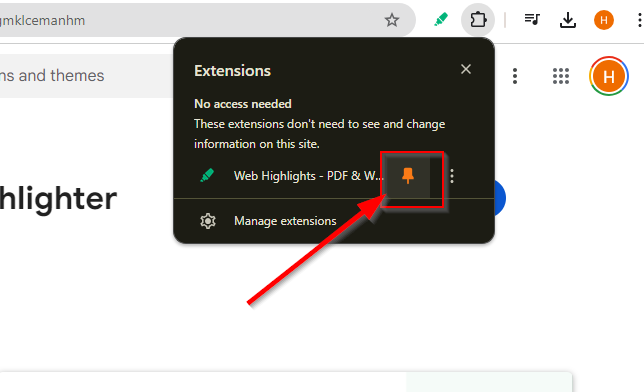
You can pin the Web Highlights extension for easy access by clicking the extension icon at the top of your browser.
Similarly, you can download the app from the web on your phone. Check out our blog on ‘Saving Bookmarks From My Phone Using Web Highlights’ for a better understanding of our mobile web app app.
And with just a few clicks, you can start annotating articles immediately!
Pro Tip: The installation process takes less than a minute, and once it's done, you can access the annotation toolbar from any web page or PDF.
Step 2: Highlight Key Information in Your Articles
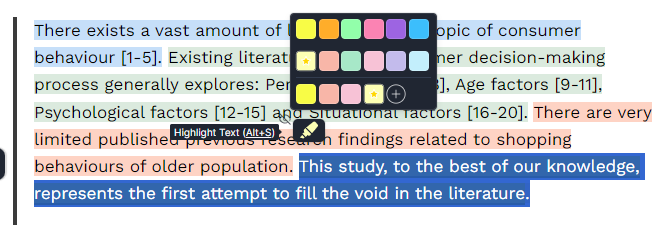
Use Web Highlights to capture key points from the abstract, like objectives, findings, and conclusions, directly on the webpage or the PDF file. This makes it easier to reference these important insights during your own study.
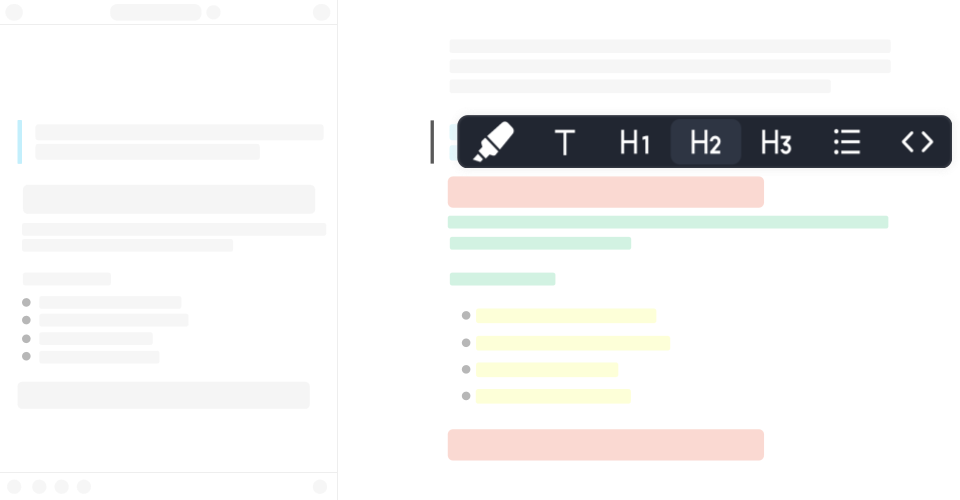
If you're working with academic or literary texts or any other digital documents, Web Highlights lets you use color-coding to separate important definitions, key arguments, and supporting evidence, keeping your highlights organized and meaningful.
But don’t fall into the trap of over-highlighting!
Over-highlighting can clutter your notes. A smarter approach is to use Web Highlights' tagging feature to categorize your highlights. This keeps your research organized and easy to manage.
This ensures that you can find exactly what you need with a few clicks instead of shuffling through multiple highlights.
Sync Tip: All your highlights are synced across devices, so you can access them from anywhere - whether on your computer, tablet, or phone.
This ensures that no matter where you are, you can pick up your research right where you left off. This is especially valuable for field researchers or those working in remote locations as it ensures your work is always accessible and up to date.
With Web Highlights, researchers no longer need to worry about losing track of their notes or missing key highlights when switching between devices.
Step 3: Add Detailed Notes and Comments
As a researcher, analyzing the key ideas in texts is important.
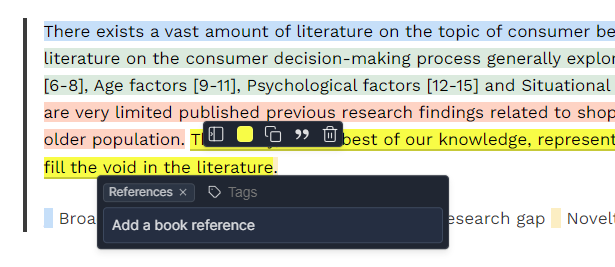
Web Highlights makes this easy as it allows you to add detailed notes and comments directly to your highlights, especially as you go into the methodology section. This feature is invaluable when comparing methods across multiple studies and referencing them easily later when drafting your research.
For example, you can create an annotation box for each highlighted section, adding personal insights or linking it to other pieces of content within your research.
This creates a complete annotation workspace that’s organized and easy to reference. Making these detailed notes improves your reading comprehension and ensures that your research remains thorough and insightful.
Pro Tip: Use the annotation feature to build a collection of notes that you can later export or share with your colleagues for collaborative annotation. This is perfect if you are working with remote teams or research projects.
You can also do formatted highlighting with Web Highlights! Read our blog to learn more.
Step 4: Organize Your Annotations for Easy Access
The next step in this guide on annotating online articles is organization!
As a researcher, you must manage a large volume of highlights and notes across multiple academic texts and digital documents. This can be overwhelming.
But when you have Web Highlights, you can shoo all your worries away!
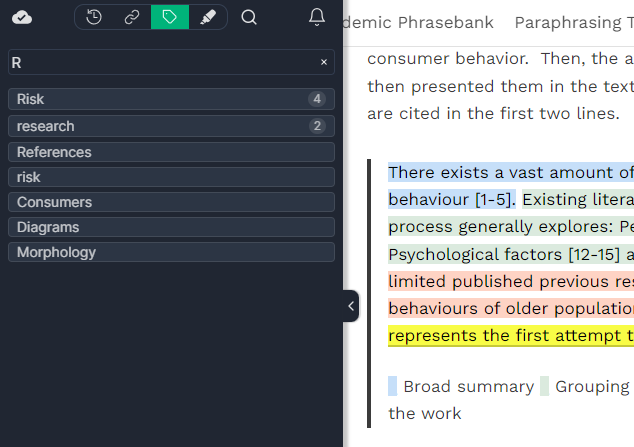
You can tag important findings in the Results section and organize them with Web Highlights for quick access. For the Discussion part, tag key insights or suggestions for future research. These organized highlights will support you when analyzing your own research outcomes.
Pro Tip: Create multiple tags based on topics like "Key Findings" for the Results section or "Future Directions" for the Discussion to easily locate relevant information when revisiting your notes."
With the annotation toolbar, you can easily add tags and organize your highlights into specific categories for future reference.
Instead of endlessly scrolling through previous highlights, you can filter by tags or keywords to quickly retrieve the exact information you need. This not only saves time but helps you stay focused on key research steps without getting lost in piles of information.
Step 5: Share and Export with Web Highlights
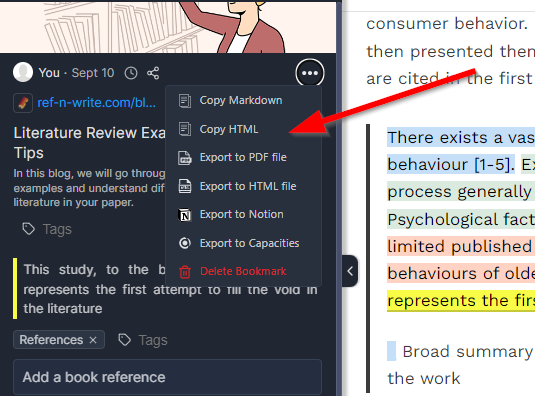
As you work through multiple articles, highlight sections of text related to important references. With Web Highlights, you can organize these citations and easily export them later for your bibliography.
Send them to a colleague or save them in a different format; Web Highlights supports painless file sharing! Export your highlights to popular platforms like Notion, Capacities, and Obsidian, which are commonly used for research management.
This allows you to share your research with others or keep it for personal use for future projects.
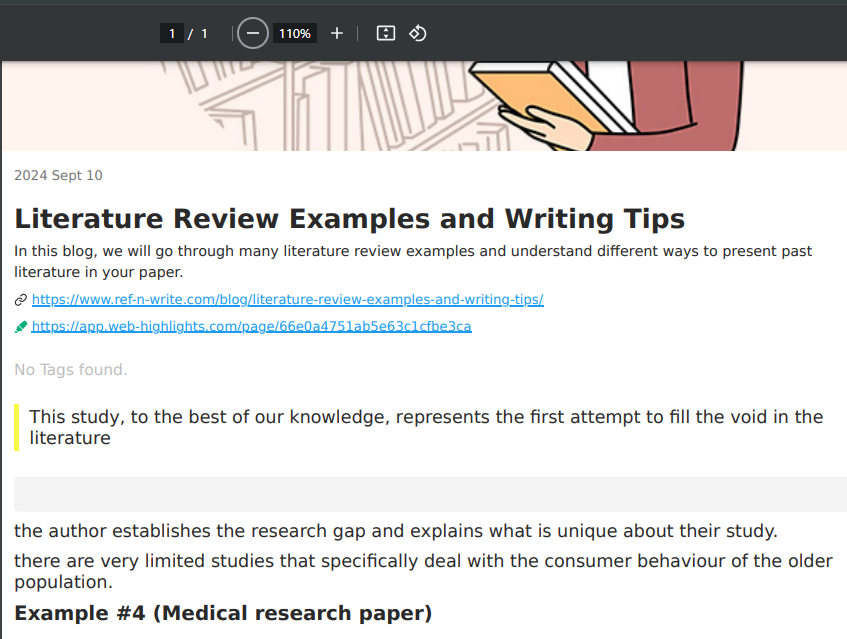
Exporting your annotations as PDF documents can save your research in an easily accessible format for future reference. It is also easier to submit your research to professors or share it with peers in PDF file format.
Here is what your annotations will look like once they are exported in a PDF file:
User Testimonials
See how people use Web Highlights to improve their research workflow and stay organized!
You can have an experience as great as these users! Just follow the simple steps above on how to annotate online articles with Web Highlights.
Find our wall of love with many great user testimonials here:
Conclusion
Annotating online articles doesn’t have to be a chore.
With Web Highlights, you can easily highlight, organize, and export your notes, transforming your research process. Its user-friendly interface offers accessible solutions for managing your digital content. This tool can improve your research workflow in just a couple of clicks!
Ready to annotate online articles? Try Web Highlights today and enjoy our simple annotating process!
It's free and easy to use without signing up!
Frequently Asked Questions (FAQs)
1. What are highlighting notes?
Highlighting notes means marking important sections in an online article or book to easily reference later.
2. How much does Web Highlights cost?
Web Highlights offers a free version with many useful features. However, it also has affordable paid versions with more advanced features. The current prices for the Premium and Ultimate versions can be found here.
3. How to annotate online articles?
Install a browser extension like Web Highlights, highlight the text, and add comments or notes to organize your research.

4. Why do researchers need to annotate articles online?
Annotating helps researchers retain key information, organize their thoughts, and easily reference important points later.
5. What is the benefit of using Web Highlights?
Web Highlights simplifies the annotation process, offers tags for organization, and supports export options to platforms like Notion, Obsidian, and Capacities.
6. How do I share my annotated articles with Web Highlights?
You can export annotations to Notion, Obsidian, and other platforms or share them directly with collaborators. You can also share your highlights to our discover page.
Check it out to find what Web Highlights users shared with our community:
Looking for More Productivity Tools?
At Tooltivity, we review the top productivity browser extensions. Read our detailed reviews here: