

Learn to build a Chrome extension with Web Components.
I always loved the web highlighter, which appears when selecting text in an article on Medium.com . I thought that it would be nice to have such functionality on each website on the internet.

I began to look for a chrome extension that provides a way to save text and bookmarks in a better-organized way. Several extensions function as a text marker, but none of them really acted according to my conceptions. That was when I decided to develop my own Web Highlights Chrome Extension .
What we build
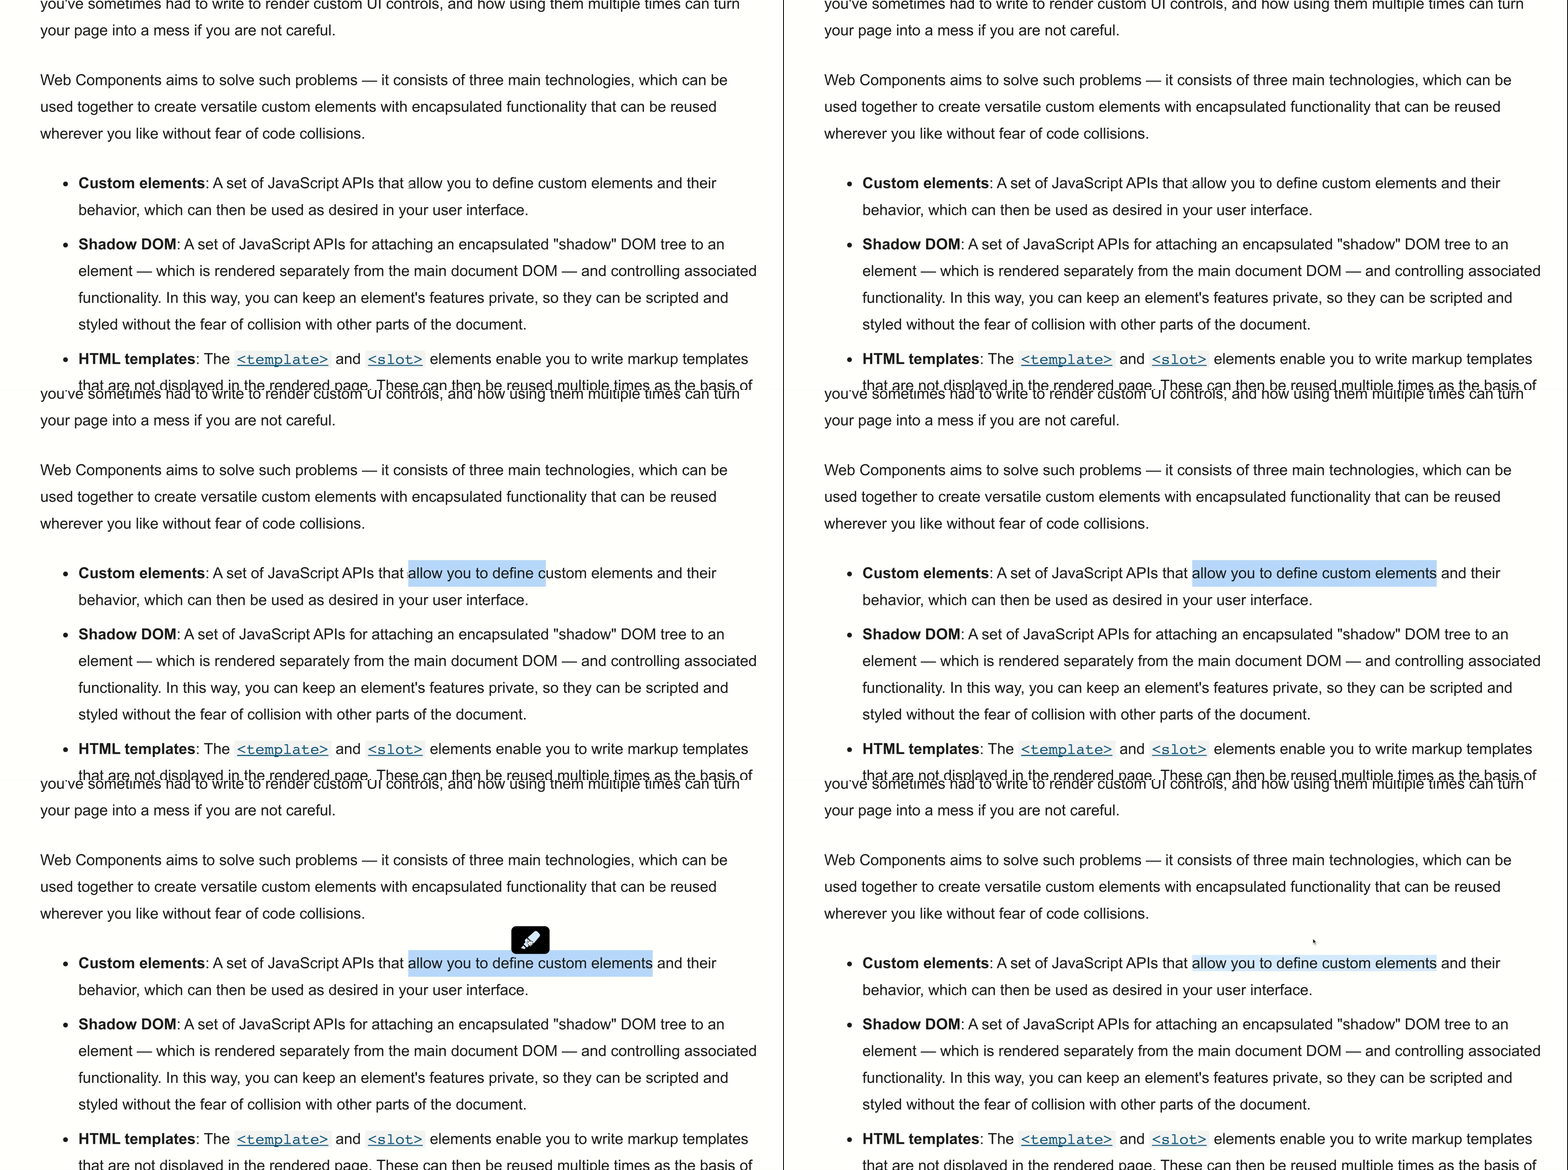
In this article, I want to show you a step-by-step guide on setting up a chrome extension that shows a text highlighter, like the one here on Medium, in the form of a Web Component. We are going to keep things simple by using basic Javascript and CSS.
Here is what we are gonna build:
For those of you who just want to go straight to the source code. You will find it here .
Let’s get started
First of all, we need to create a
manifest.json
file. This is the entry point of our extension, which defines metadata, such as name and version, as well as
additional functionalities.
Let’s create a
manifest.json
and add some metadata:
The first three values
name
,
version
and
manifest_version
are enough to create our first chrome extension.
Install the extension
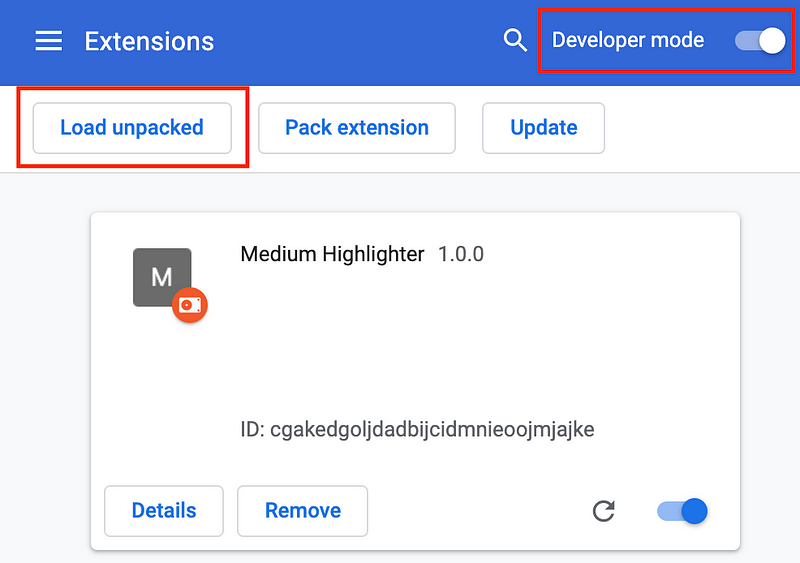
Open your Chrome browser and navigate to chrome://extensions .
Enable Developer Mode by clicking the toggle switch next to
Developer mode
. Click the
Load unpacked
button and select the directory with our
manifest.json
.
Congratulations! You’ve just created your first Chrome Extension!
Add some functionality
We have just installed our own extension. Still, currently, it doesn't do anything because we haven’t added
functionality to our
manifest.json
.
To make our text-highlighter work we need a functionality that can read the DOM and make changes to it. For that, we will create content scripts. The chrome developer documentation defines content scripts as follows:
Content scripts live in an isolated world, allowing a content script to make changes to its JavaScript environment without conflicting with the page or other extensions’ content Scripts.
Let’s create two files, each with one alert, to ensure that they are successfully loaded by our extension. Those files will act as our content scripts.
The
content.js
script is the entry point of our extension. It will be responsible for creating the Web Component, that will be
defined in the
medium-highlighter.js
file.
Let’s adjust our
manifest.json
to inject our scripts:
To use our statically declared scripts we need to register them under the
content_scripts
field. This field needs to define the
required
attribute
matches
to specify on which pages the content script will be injected into. For that, you can specify several
match patterns
. We will just use the special pattern
<all_urls>
to match any URL that starts with a permitted scheme- for example
http
or
https
.
We also define the optional field
js
. Here we define our scripts to be injected into matching pages.
Let´s update our extension by pressing the refresh button of the extension on
chrome://extensions
. We can now navigate to any page and, if done correctly, two alerts should appear when the page is loaded.
To be honest a really annoying extension. So let’s get started with creating our text-highlighter Web Component.
Defining the Web Component
Finally, we set up the basic structure of our extension. We can now go ahead and create our text-highlighter in a familiar Javascript environment. Or better to say in the isolated world of content scripts.
Template
We want to show a button with an icon whenever a user selects text on websites. Additionally, we need an element that will be wrapped around the selected text to indicate a highlight on the page. That’s our template which will be rendered by our Web Component:
First of all, we create a constant for our highlight color to follow the
DRY principle
because we will use it again later. It is also noticeable that we will make use of the
template
HTML tag. This will be our wrapper element around highlighted text.
Template elements are one of the three main technologies of Web Components. They are used to hold HTML content that is not rendered immediately and can be instantiated subsequently during runtime. Since we will need text highlights many times and it should not be visible from the beginning, it makes sense to use this technology.
Styling
To make our highlighter look good and also appear at the right place we need to define some dynamic styling:
Per default, our highlighter should not be visible and its position should be in the upper left corner. We also re-use
our
highlightColor
constant to color our marker icon.
Defining the Custom Element
Now it is time to define our Web Component and use our template with its styling. That’s how our custom element looks like:
Well, that’s a lot. Don’t worry I will guide you through it:
First, we will have a look at the constructor. Since we are inheriting from
HTMLElement
the
super()
call is necessary to establish the correct prototype chain. Additionally, we define our custom-element
medium-highlighter
at the end of the file.
After the super call, we trigger our
render
function. You can see that we are attaching a shadow dom to our element. The shadow DOM is another main technology of
Web Components next to templates and custom elements. It enables us to encapsulate our style rules from other global
styles on any page. After the initialization, we add our template and default styling to our shadow DOM. Finally, we
add a click listener to our button to trigger the
highlightSelection
and
highlightRange
functions, that are responsible for creating our highlight template around the selected text of the user.
Next to just creating the highlighter, our custom element also needs to set the position of our marker dynamically.
For that, we defined our dynamic style function which should be updated whenever a user selects text. To make this
work we will define an attribute, that will be passed by our
content.js
file as a JSON string. We can listen for attribute changes as soon as we return our attribute in the static
observedAttributes
function. Now we can listen for changes within the
attributeChangeCallback
to dynamically set the position and visibility of our text highlighter.
Our Web Component is ready to be used. Now we only need to create it with the help of the
content.js
file.
Creating the Web Component
We finished the setup of our Web Component so let’s quickly test it by adding this to our
content.js
file:
Since we added our
medium-highlighter.js
to the
manifest.json
we can use our custom element within our
content.js
file. We create an element of it and pass the
markerPosition
attribute as a JSON string. We set the position and visibility to make the element appear in the upper left corner of
the screen.
Adding polyfills
We can now refresh the extension and navigate to any page. We assumed that our marker would appear. Unfortunately, it doesn´t. You will find the reason in the console of your developer tools.

Earlier I mentioned, that our content scripts are living in an
isolated world
. Until now this environment is not ready to use custom elements. Luckily there are
polyfills
to fix this issue. We just need to include them in our
manifest.json
:
You can install them by running
npm install @webcomponents/custom-elements
. In case you haven´t created a package environment yet run
npm init --yes
in advance.
After that, we should finally see our marker icon in the upper left corner of the screen after refreshing the extension.
Finally set the position of the marker
Since we don´t want the marker to stick in the corner we will set its position dynamically depending on a user´s text
selection. Let’s add this code to our
content.js
file and remove the initial
setMarkerPosition
function of our demo:
Whenever the user clicks and there is a current text selection we want to show the marker at this specific position.
To calculate the position we created the function
getMarkerPosition
. Next to creating the marker we also have to make sure that we will hide it again. For that, we create a
selectionChange
event to hide the marker when there is no text selected.
Refresh the extension and enjoy your very own text highlighter :)
You can find the Github repository here .